Every Deep Light setting for ETS2 and ATS, explained
This is the panel as you see it in the game. Move a setting and the screenshot follows. Point at a setting, or tap it, to read what it does.
- Pick a presetReal Life, Photorealist or Bright Haze set the whole look at once. Most players stop here.
- Adjust BrightnessIf your monitor or the time of day makes it too dark or too bright.
- Choose the upscalerDLSS or FSR for a sharp image and more frames, plus frame generation in Pro.
Everything else is optional: it is there if you want to shape the look further.
Deep Light 1.1.0 | DirectX 12 | all checks OK
DLAA, DLSS, FSR and frame generation are off too: the game's TAA runs until ON.
ON / OFF key: none
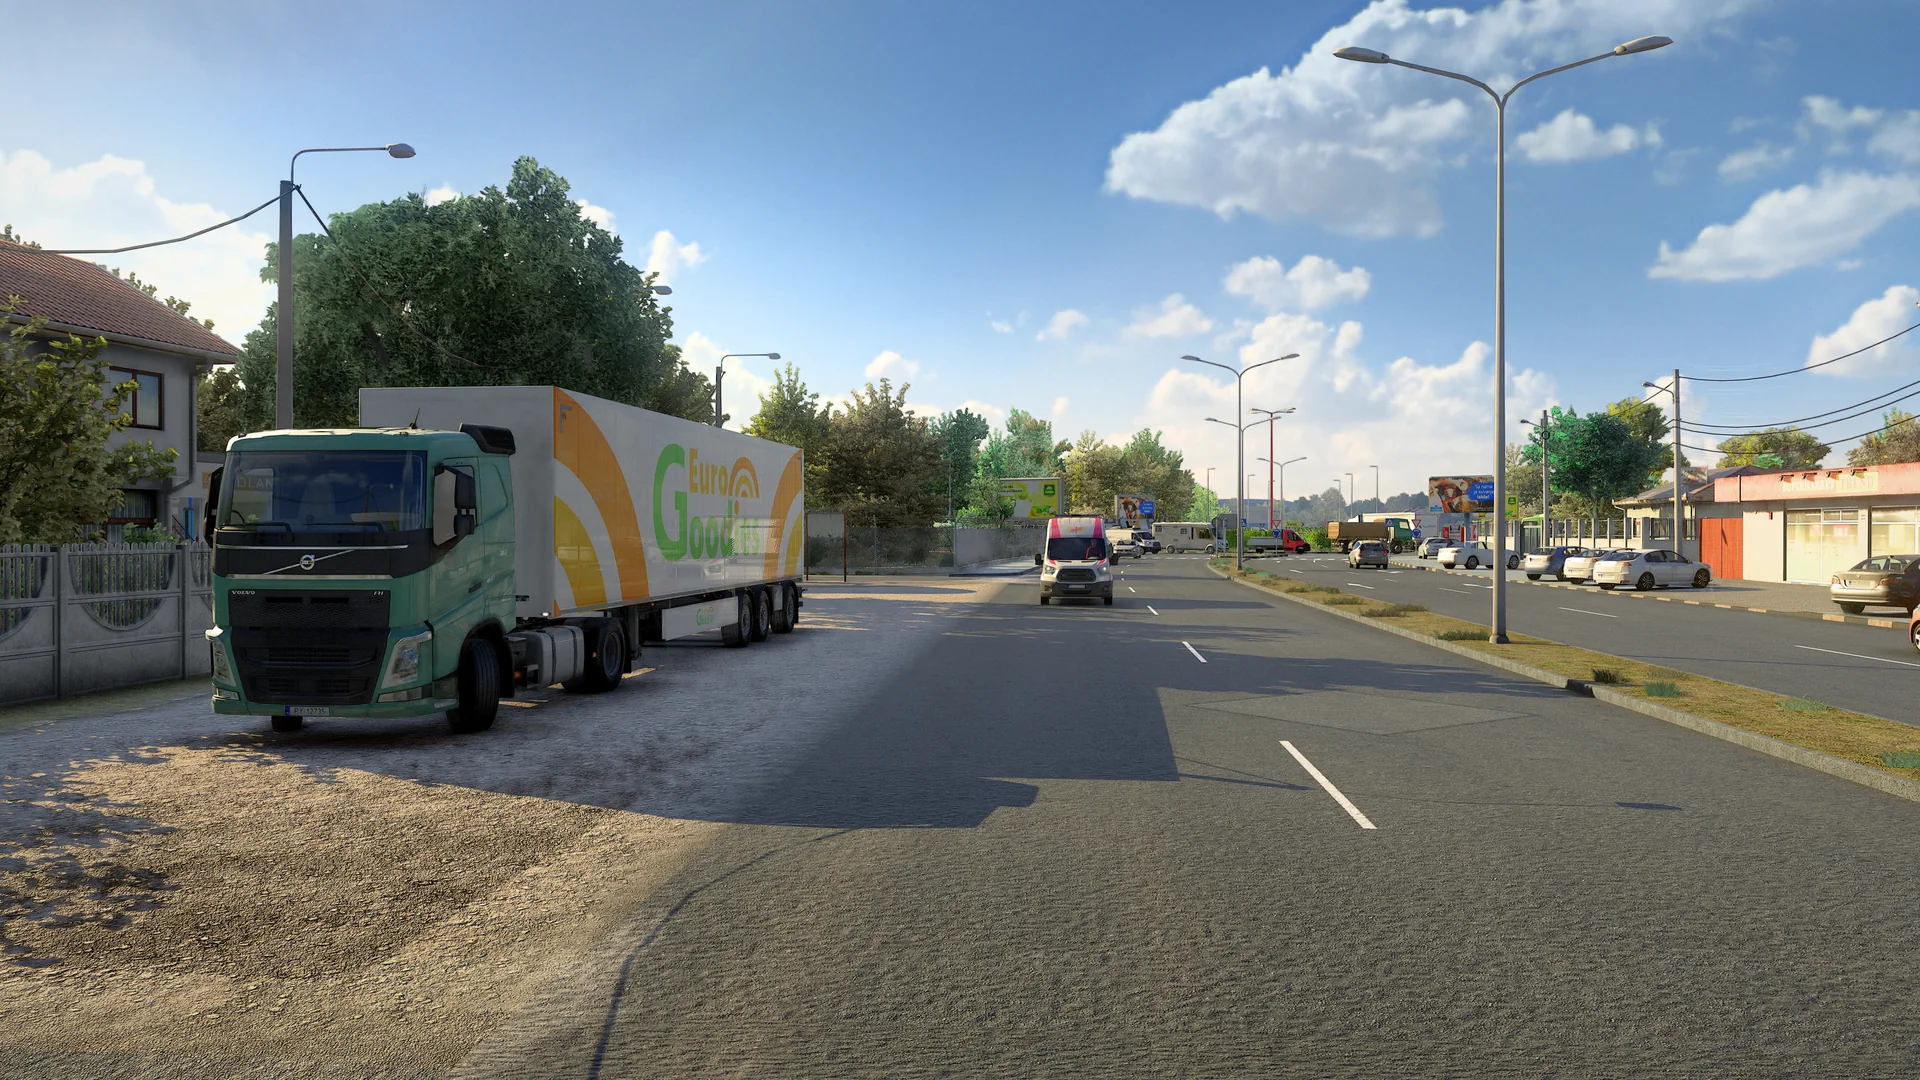
Every picture here is real: the spot was photographed in the game with each preset, with Deep Light off, and with each setting at several values. Moving a slider blends between those photos.
Best settings for more FPS
With every effect on and at the same resolution, Deep Light took about 20% to 40% of the frame rate on my test PC. These steps win it back, and more, in this order.
- Upscale instead of rendering at full sizeSet the game's Scaling below 100% (about 67% for Quality) and Anti-aliasing to Upscaling. DLSS on NVIDIA RTX, FSR on every other DirectX 12 card. This is the biggest single gain.
- Turn on frame generationPro, DirectX 12. Dynamic fills your display's refresh rate. It also helps in towns and busy depots, where the game waits on the processor and no graphics setting can.
- Switch off the effects you do not missContact shadows go first. Physically based lighting costs the most of the look settings, and it is also most of the look.
- Use a lighter DLSS modeBalanced or Performance in the game's Scaling (58% or 50%): fewer pixels to render, a little softer picture.
Questions about the settings
- Which Deep Light preset should I use?
- Start with Real Life: deeper shadows and natural contrast, measured against thousands of real road photos. Photorealist, calibrated on real photos, is the other natural look. Bright Haze v2 is lighter and warmer. A preset sets the whole look at once and every value stays yours to change. Presets are part of Deep Light Pro.
- How much FPS does Deep Light cost?
- With every effect on and at the same resolution, Deep Light took about 20% to 40% of the frame rate on my test PC: about 20% in a busy depot where the game waits on the processor, about 40% at 4K on an open road. Upscaling at about 67% and frame generation win that back, and more.
- What are the best Deep Light settings for more FPS?
- Set the game's Scaling below 100% and Anti-aliasing to Upscaling, so DLSS or FSR renders fewer pixels. Then turn on frame generation (Pro, DirectX 12). If you still need more, switch off Contact shadows, and use Balanced or Performance (58% or 50% Scaling).
- Does Deep Light work on AMD and Intel graphics cards?
- Yes. FSR upscaling, native anti-aliasing and FSR frame generation run on any DirectX 12 graphics card, with FSR 4 by default on Radeon RX 9000. DLSS and DLAA need an NVIDIA RTX card.
- Which settings are free and which need Pro?
- Deep Light Core is free: DLSS, DLAA and FSR anti-aliasing and upscaling, the colour grade, basic physically based lighting, sharpening, night exposure, dark nights and cabin lighting. Pro adds the presets, frame generation and every material: roads, paint, terrain and leaves. Switch the panel above to Core to see what the free version shows.
Every setting in plain words
The same settings as the panel above, tab by tab. A preset sets almost all of them at once, and every value stays yours to change.
Home
What most players need on one screen: Deep Light on or off, the four presets, six quick adjustments, and the upscaler with frame generation.
- Real Life
- Measured against thousands of real road photos: deeper shadows, natural contrast, no burnt sky.
- Photorealist
- Calibrated on real photos.
- Bright Haze v2
- Tuned by eye in game: lifted shadows, deep shadow fill, warm haze, sharp.
- Brightness
- Brighter or darker picture, in steps of light (EV). The same value as Exposure on the Colour tab.
- Shadows
- How much sky light reaches the places the sun does not: higher gives brighter, more colourful shadows. The same value as Shadow fill on the Light tab.
- Colour
- How colourful the picture is. The mark leaves the colour as the preset made it. The same value as Saturation on the Colour tab.
- Warmth
- Warmer, golden light to the right, cooler and bluer to the left. The same value as Temp on the Colour tab.
- Motion blur
- Blur from your own speed, as a camera sees the road rush past. All the way left turns it off. It only shows while you drive, so a still picture cannot show it.
- Sharpness
- Sharper detail after DLSS, DLAA or FSR. All the way left is off, the mark is AMD's maximum, all the way right twice as strong.
- Sharpen edges
- Sharpens only contours, not fine texture: no shimmer on grass, gravel or asphalt grain.
- Sharpness with frame generation
- Used instead of Sharpness while frame generation runs. All the way left is steadiest: sharpened fine detail can flicker between real and generated frames.
Light
How the world is lit: the sun, the sky light in the shadows, reflections and haze.
- Lighting method
- The light model under the preset. Every method keeps its own lighting and colour values. D draws the game's own lighting.
- Physically based lighting
- Deep Light lights the world itself: sun, sky and reflections that behave like real light on each material. Starts with the game.
- PBR strength
- How much of the new lighting you see, from the game's lighting on the left to all of it on the right.
- Sun intensity
- Strength of direct sunlight.
- Sky light
- Strength of the soft light that comes from the whole sky.
- Reflections
- How strongly surfaces reflect the sky.
- Roughness bias
- Rougher, more matte surfaces to the right; glossier to the left.
- Shadow fill
- More sky light where the sun does not reach: brighter, more colourful shadows. All the way left is physical.
- Ground reflections
- A stronger sky reflection on surfaces that face up (roads, pavements, roofs) in dry weather. All the way left is physical.
- Wet sun glint
- Extra sun highlight on wet surfaces, following the game's rain. All the way left is physical.
- Albedo brightness
- Brighter surfaces (roads, buildings, vehicles) without a brighter sky. The mark is physical.
- Albedo saturation
- Richer surface colour under sun and sky light, without touching grey.
- Sky light direction
- How much the sky light comes from the bright part of the sky. Lower is flatter, like the game's ambient light. All the way right is physical.
- Sun occlusion
- Darker contact areas in sunlight too: at kerbs, walls and under objects. All the way left is physical.
- Ambient occlusion depth
- Deeper shade in creases and corners; open surfaces keep their light. All the way left is the game's.
- Shadow edge sharpness
- Crisper edges on sun shadows. All the way left is the game's.
- Aerial haze
- Distant scenery fades into the colour of the sky, as it does through real air. All the way left is off.
- Haze distance
- How far away the haze builds up.
- Apply the game light values
- Uses the values below on the game's own light. Off leaves the game's light as it ships.
- AO strength
- Strength of the game's ambient shading in corners and under objects.
- Directional
- How much that shading follows the direction of the light.
- Floor (darkest)
- The darkest that shading may get. All the way left keeps the game's.
- Ambient light
- The game's overall ambient light.
- Ambient direction
- How much the ambient light comes from one side.
- Game reflections
- Strength of the game's own reflections.
- Contact shadows
- Fine shadows where things meet: wheels on the road, kerbs, posts, mirrors.
- Shadow strength
- How dark a contact shadow is.
- Shadow length
- How far from a surface an object still darkens it.
- Ambient occlusion
- Darker creases and corners in the sky light.
- Occlusion radius
- How wide that darkening reaches.
Colour
The colour grade and the tone curve: what a photographer does to a raw photo, done live while you drive.
- Colour grade
- Turns the whole colour grade below on or off.
- Temp
- White balance. Higher is warmer, more golden; lower is cooler, more blue.
- Tint (R G B)
- Fine white-balance gains for red, green and blue on top of Temp. On the marks it changes nothing.
- Exposure
- Brighter or darker, in steps of light. Brightness on Home moves it too.
- Saturation
- More or less colour everywhere. Colour on Home moves it too.
- Contrast
- Distance between the dark and the bright parts.
- Vibrance
- More colour where colour is weak, leaving strong colours alone.
- Colour boost
- More saturation where a colour is already strong; grey stays grey. All the way left is off.
- Highlight desaturation
- Bright colours, above all the sky, lose some saturation: a hazier, more photographic sky. All the way left is off.
- Shadows
- Lifts or deepens the dark tones.
- Highlights
- Brings back or pushes the bright tones.
- Blacks
- Where black starts: right lifts it to a soft grey, left makes it deeper.
- Whites
- Where white starts.
- Pre-exposure
- Exposure before the tone curve: brighter mid tones while the sky keeps its detail.
- Pre-contrast
- Contrast before the tone curve.
- Dynamic contrast
- Local contrast: shapes and depth stand out without a harsher picture overall.
- Night exposure
- Brighter or darker nights only. Try it on the night scene.
- Dark nights
- How much of the daytime brightening fades out at night. All the way right keeps nights dark; all the way left gives nights the day's lift.
- Daylight desaturation
- Colour taken out in full daylight, none at night: softens ETS2's very saturated textures.
- Filmic tonemap
- A film-like curve for the brightest parts: highlights roll off softly instead of burning to white.
- Contrast
- The curve's contrast.
- Mid grey
- How bright the middle tones come out.
- Shoulder start
- Where the soft roll-off of the bright tones begins.
- White
- How much brighter than mid grey a light must be to reach pure white.
- Toe
- The shape of the darkest tones.
- Hue in highlights
- Left: bright colours fade to white like film. Right: colours keep their hue up to white.
- Game exposure
- The game's own exposure, before Deep Light's grade.
- Game saturation
- The game's own saturation.
- Game warmth
- The game's own colour warmth.
Nature
Trees, grass, the ground and water.
- Foliage thickness
- All the way right is the game's foliage; to the left it thins tree crowns, hedges and grass, down to bare branches. A late-autumn look.
- Foliage quality (full at distance, soft edges)
- Keeps distant trees full and smooths the edges of leaves.
- Leaves: sky light
- Sky light on tree leaves: right of the mark, foliage reads brighter and softer.
- Leaves: sun specular
- Sun glare on tree leaves: left of the mark, less shiny foliage.
- Leaves: sun occlusion
- Less direct sun on leaves deep inside a crown: darker, deeper trees. All the way left is physical.
- Subsurface scattering (leaves)
- Sunlight shines through leaves from behind, as it does through real ones.
- SSS strength
- How much light comes through.
- SSS leaf thickness
- Thicker leaves let less sunlight through.
- Light through crowns
- How much light reaches through a whole tree crown.
- Terrain relief
- Relief in grass and soil, so the ground catches a low sun. All the way left is the game's flat ground.
- Terrain detail
- Fine grain on the ground, fading with distance.
- Water
- Rivers and lakes with living waves and the sun's glittering path on them.
- Waves
- Waves in several directions on top of the game's ripple.
- Wind gusts
- Gusts that roughen patches of water and leave others calm.
- Sun path
- The sun's glittering trail on the water.
- Sun path sharpness
- Low: a broad soft path. High: a tight sparkling one.
- Sky glints
- The sky glinting on wave crests, also without sun.
- Rain ripples
- Rings from raindrops on the water while it rains.
- Shore foam
- Foam lapping where the water meets the shore.
- Colour by depth
- Clear shallows that show the bed, green-blue deeper water.
- Water tint
- Pulls the water's own colour towards the hue below; its reflection stays.
- Water hue
- The water's colour around the colour wheel: muddy brown, green-blue or blue.
- Show water depth
- Colours the water by depth for a moment: red shallow, yellow up to 2 m, blue deep.
Roads
Asphalt, kerbs and paving: relief, grain, colour, wear and the wet look.
- Road relief
- Surface relief of the asphalt, so it catches the light. All the way left is the game's flat road.
- Road detail
- Fine grain the game's road textures do not have.
- Asphalt neutral
- Grey asphalt instead of the game's yellow cast; lane paint keeps its colour.
- Asphalt warmth
- Warmer or cooler, bluish asphalt.
- Asphalt saturation
- More or less colour in the asphalt; all the way left is grey.
- Asphalt brightness
- Lighter or darker asphalt; near the left end it turns black, and at the very end the sheen goes too. Lane paint keeps its colour.
- Asphalt hue
- Turns the asphalt's colour around the colour wheel.
- Asphalt tint
- Paints the asphalt the colour Asphalt hue picks.
- Road roughness
- Rougher or smoother dry asphalt.
- Cracks and patches
- Worn asphalt: cracks that hold water in the rain, and darker patches of fresh asphalt. All the way left is the game's road.
- Wet roads
- Auto follows the game's rain.
- Puddles
- Puddles in the dips while the road is wet.
- Rain ripples
- Animated drops in the puddles while it rains.
- Sidewalk warmth
- Warmer or cooler kerbs, dark paving and park soil.
- Sidewalk saturation
- More or less colour in kerbs and paving; all the way left is grey.
- Sidewalk brightness
- Lighter or darker kerbs and paving; all the way left is black.
- Sidewalk hue
- Turns the paving colour around the colour wheel.
- Sidewalk tint
- Paints kerbs and paving the colour Sidewalk hue picks.
Vehicle
Your cab, the paint, dirt, headlights and the reflections on vehicles.
- Cabin lighting
- Its own brightness and colour for the inside of your cab, so it is not lost in the dark against a bright day outside.
- Cabin brightness
- How bright the inside of the cab is.
- Cabin warmth
- Warmer or cooler light in the cab.
- Cabin saturation
- More or less colour in the cab.
- Cabin reflections
- How much the dashboard and trims reflect.
- Cab SSAO
- Soft shade in the corners and folds of the cab.
- Cab distance (m)
- How far from the camera the cab shading reaches.
- Cab radius
- How wide the shade spreads.
- Cab strength
- How dark the shade gets.
- Clear coat
- A glossy lacquer layer: brighter reflections at grazing angles and a sharp sun highlight.
- Metallic flakes
- Fine sparkle in the sun on painted panels, fading with distance.
- Dirt
- Road dust on vehicles. Off keeps the amounts below for later.
- Dirt on body
- Road dust on the lower body of every truck, trailer and car.
- Dirt on wheels
- Dust and mud around the wheel arches and the lowest panels.
- Headlight colour
- The colour of headlights on the road and in the beams: warm halogen, white xenon, cool LED or blue-white LED Matrix.
- Traffic too
- Off: only your truck's headlights change colour. On: every vehicle's.
- Vehicles
- The world reflected in the paint of trucks, trailers and cars.
- Glass
- The world reflected in vehicle windows.
Effects
What lights up the air and mirrors the world: reflections, sun rays, the sky and light beams.
- Reflections
- Wet roads and puddles mirror what is around them: trees, vehicles, bridges and lights at night.
- Strength
- How strong the reflections are.
- Distance (m)
- How far away a reflected object can be.
- Sun rays
- Rays of light through trees, under bridges and past buildings while you drive towards the sun.
- Strength
- How bright the rays are.
- Length
- How far a ray reaches towards you.
- Lens flare
- The glow and ghosts a camera lens makes when you look into the sun.
- Real sky
- A brighter daytime sky that turns whitish towards the horizon, a glow around the sun and more detail in the clouds, as in real photos.
- Brightness
- How bright the sky is by day.
- Horizon glow
- Extra brightness towards the horizon.
- Horizon haze
- A whiter horizon, as through real air.
- Magenta fix
- Takes the pink cast out of the game's sky.
- Sun glow
- A brighter sky around the sun.
- Cloud detail
- More shape and contrast in the clouds.
- Light beams
- Headlights, street lights and lamps light up the air: beams you see from the side, at night and in fog.
- Street lights
- Beams of street lights, lamps and signs.
- Headlights
- Beams of vehicle headlights, yours and the traffic's.
- By day
- How much of the beams stays in daylight: on the left only at dusk and night, on the right all day.
- Air density
- How thick the air is: higher reads like mist or fog.
Quality
Shading in corners, the game's own anti-aliasing, sharpening and motion blur.
- Replace the game SSAO shader (restart)
- A better version of the game's ambient shading in corners and under objects, without its blotches far away.
- SSAO radius
- How wide the corner shading spreads.
- SSAO max radius
- The widest it may spread on screen.
- SSAO extra steps
- More samples: smoother shading, a little slower.
- SSAO thickness
- How thick objects are taken to be. All the way left keeps the game's.
- TAA clarity
- With the game's own TAA: a clearer, less smeared picture in motion.
- TAA sharpen
- With the game's own TAA: its built-in sharpening.
- Sharpening
- Sharper detail after DLSS, DLAA or FSR. All the way left is off, the mark is AMD's maximum, all the way right twice as strong. Also on Home, under Image.
- Sharpen edges only
- Sharpens only contours (buildings, poles, vehicles), not fine texture: no shimmer on grass, gravel or asphalt grain.
- Motion blur
- Blur from your own speed and from moving vehicles, as a camera sees it.
- Strength
- How long the blur trails are.
- Quality
- Smoother blur at a small cost in frame time.
Image
Anti-aliasing, upscaling and frame generation: sharpness and frame rate.
- Anti-aliasing
- Game TAA keeps the game's own. Native AA renders at your screen size and smooths it with DLAA or FSR. Upscaling renders smaller (the game's Scaling: about 67% Quality, 58% Balanced, 50% Performance) and DLSS or FSR brings it up to your screen: more FPS.
- Upscaler
- Auto picks DLSS on NVIDIA RTX cards and FSR on every other card. FSR needs DirectX 12.
- DLSS preset
- Which DLSS model runs. K (DLSS 4) is the steadiest in ETS2; DLSS 4.5 can flicker on fine detail.
- Object motion vectors (moving vehicles, wheels)
- Tells DLSS or FSR how each moving vehicle and wheel moves, so they stay sharp with no trails.
- Texture detail (restart)
- Sharper textures with DLAA, DLSS or FSR: the game picks finer texture levels and the upscaler keeps them steady.
- Load frame generation at game start
- DLSS frame generation on RTX 40 and 50 cards, FSR frame generation on every other card. Read when the game starts.
- Frame generation
- Adds generated frames between the rendered ones: a much higher frame rate on screen.
- Multiplier
- How many frames on screen per rendered frame, up to 6x with DLSS. Dynamic fills your display's refresh rate. FSR frame generation is 2x.
- Target FPS (0 = refresh rate)
- With Dynamic: the frame rate to aim for, and a cap. 0 is your display's refresh rate.
- HUD-less colour (keeps the HUD sharp)
- Keeps the HUD out of the generated frames, so it stays sharp. Experimental.
Try it on your own roads
Deep Light Core is free for life. Pro adds the presets, every material and frame generation.
One licence covers ETS2 and ATS. No always-online: it works offline for up to 30 days. See the FAQ for what happens if you stop.